How to Apply Epoxy Floor Sealers: A Step-by-Step Guide
Applying epoxy floor sealers is an essential process that can significantly enhance the durability, appearance, and longevity of your flooring. Whether you are a homeowner looking to protect your garage floor or a business owner wanting to maintain a commercial space, understanding how to properly apply epoxy floor sealers is crucial. This comprehensive guide will walk you through the entire process, from preparation to final application, ensuring that you achieve the best results possible.
Understanding Epoxy Floor Sealers
What are Epoxy Floor Sealers?
Epoxy floor sealers are protective coatings applied to epoxy flooring systems to enhance their durability and resistance to stains, chemicals, and wear. These sealers create a robust barrier that protects the underlying flooring while also improving its aesthetic appeal. Available in various formulations, epoxy floor sealers can be tailored to meet the specific needs of different environments, making them suitable for both residential and commercial applications.
Benefits of Using Epoxy Floor Sealers
Before diving into the application process, it's essential to understand the benefits of using epoxy floor sealers:
Protection Against Stains and Damage: Epoxy sealers create a barrier that prevents liquids from penetrating the surface, making it easier to clean up spills and avoid permanent damage.
Enhanced Durability: Sealed epoxy floors are more resistant to wear and tear, extending the lifespan of your flooring and reducing the need for repairs.
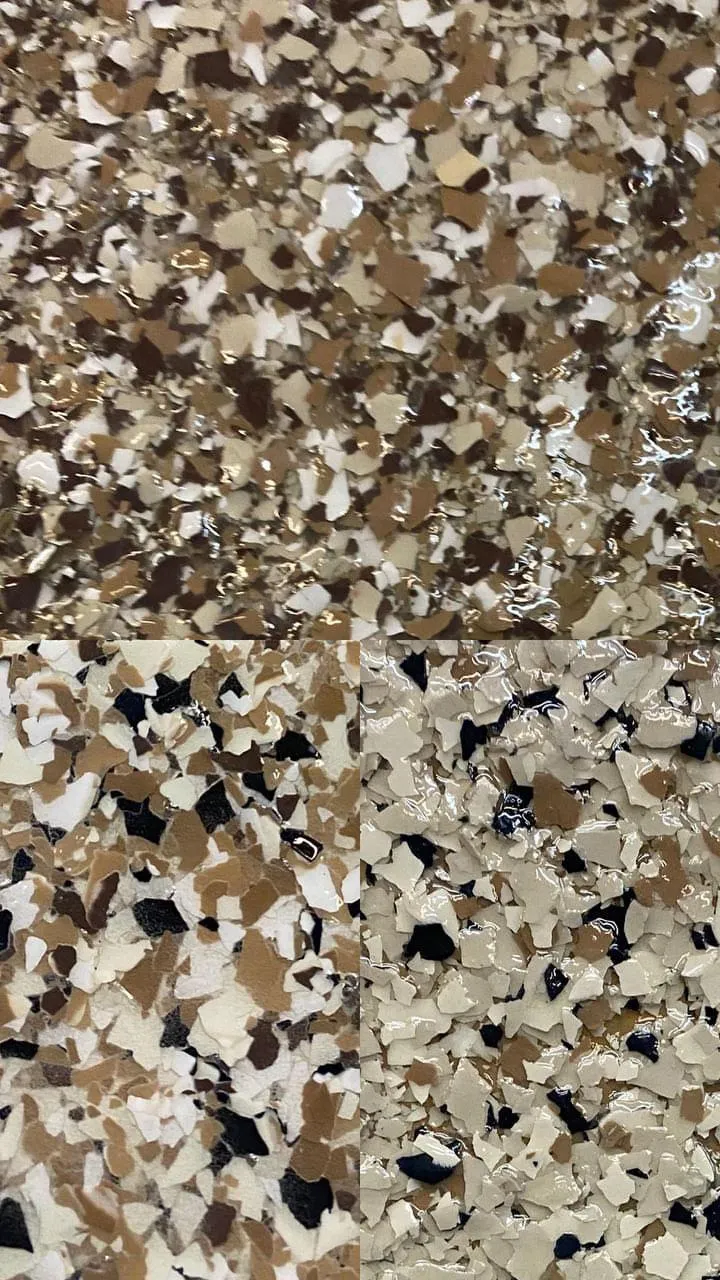
Aesthetic Improvements: Epoxy sealers come in various colors and finishes, allowing you to customize the appearance of your flooring to match your style.
Improved Slip Resistance: Many epoxy sealers are designed with anti-slip additives, enhancing safety in areas prone to moisture.
Ease of Maintenance: Sealed epoxy floors are easier to clean and maintain, saving you time and effort in the long run.
Preparing for Application
Step 1: Gather Your Materials
Before you begin the application process, gather all the necessary materials and tools. Here’s a list of what you will need:
Epoxy Floor Sealer: Choose a high-quality epoxy floor sealer suitable for your specific application. Brands like Rust-Oleum and Sherwin-Williams offer a variety of options.
Cleaning Supplies: Degreaser, broom, vacuum, and mop for cleaning the surface.
Repair Materials: Epoxy filler for repairing cracks or damage in the flooring.
Application Tools: Roller, squeegee, paintbrush, and mixing bucket for applying the sealer.
Protective Gear: Gloves, goggles, and a mask to protect yourself during the application process.
Step 2: Prepare the Surface
Proper surface preparation is crucial for the success of your epoxy floor sealer application. Follow these steps to ensure a clean and suitable surface:
Clean the Floor: Remove any dirt, dust, grease, and debris from the floor. Use a degreaser and a mop to ensure that the surface is free of contaminants. For stubborn stains, consider using a power washer to thoroughly clean the area.
Repair Any Damage: Inspect the floor for cracks, chips, or other damage. Fill any imperfections with an appropriate epoxy filler and allow it to cure according to the manufacturer's instructions. This step is essential for creating a smooth and even surface for the sealer.
Etch the Surface: If the floor is smooth, consider etching it with a concrete etcher or a mixture of muriatic acid and water. This process creates a rough surface that helps the epoxy sealer bond better. Follow safety precautions when using etching solutions, and ensure proper ventilation.
Step 3: Choose the Right Time
Timing is essential when applying epoxy floor sealers. Ideally, you should choose a day with low humidity and moderate temperatures for the application. Extreme temperatures or high humidity can affect the curing process and the overall performance of the sealer. Check the manufacturer's guidelines for recommended temperature and humidity levels before proceeding.
Applying the Epoxy Floor Sealer
Step 4: Mix the Epoxy Sealer
Before applying the epoxy floor sealer, you need to mix the components according to the manufacturer's instructions. Most epoxy sealers come in two parts: a resin and a hardener. Follow these steps:
Read the Instructions: Carefully read the manufacturer's instructions to understand the mixing ratio and any specific requirements.
Mix Thoroughly: In a clean mixing bucket, combine the resin and hardener. Use a mixing stick or a drill with a mixing attachment to blend the components thoroughly. Ensure there are no lumps or unmixed areas, as this can affect the performance of the sealer.
Let It Rest: After mixing, allow the epoxy to rest for a few minutes as recommended by the manufacturer. This process, known as "induction time," helps the components activate and ensures a better bond during application.
Step 5: Apply the Epoxy Floor Sealer
Now that your surface is prepared and the epoxy sealer is mixed, it’s time to apply the sealer. Follow these steps for a successful application:
Start in a Corner: Begin applying the epoxy sealer in a corner of the room and work your way toward the exit. This approach prevents you from stepping on wet areas.
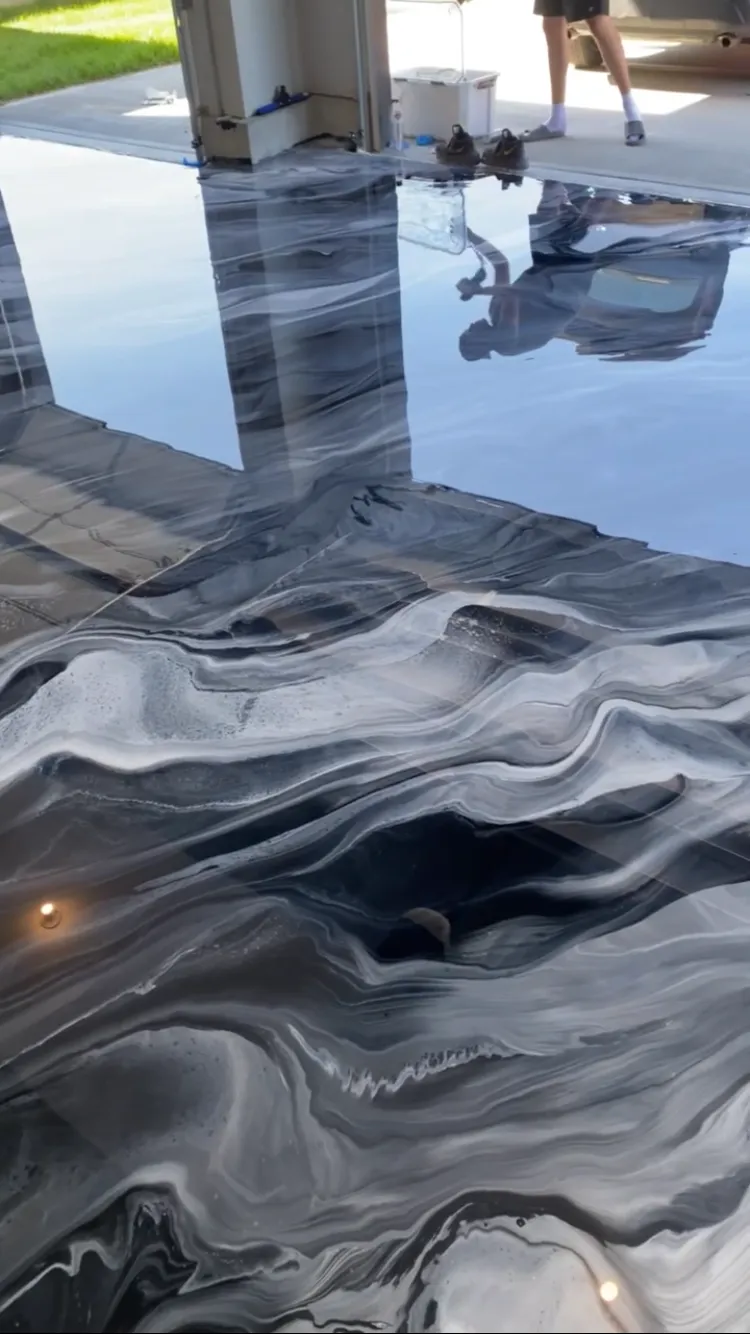
Use a Roller: Dip a roller into the mixed epoxy and apply it evenly across the surface. Use a long-handled roller for larger areas to make the process easier. Apply the sealer in a thin, even coat, working in sections to ensure consistent coverage.
Use a Squeegee for Large Areas: For larger surfaces, consider using a squeegee to spread the epoxy more efficiently. This tool can help you achieve a smooth and even finish.
Cut in Edges with a Brush: Use a paintbrush to cut in around edges, corners, and any obstacles such as pipes or columns. This ensures that every part of the floor is adequately sealed.
Sprinkle Anti-Slip Additives (Optional): If desired, you can sprinkle anti-slip additives onto the wet epoxy to enhance traction. Follow the manufacturer's guidelines for the appropriate amount to use.
Step 6: Allow to Cure
After applying the epoxy floor sealer, it’s crucial to allow it to cure properly. Follow these steps:
Check Curing Time: Refer to the manufacturer's instructions for the recommended curing time. Curing times can vary based on the product and environmental conditions.
Avoid Foot Traffic: Keep the area free from foot traffic during the curing process. This is essential for ensuring a smooth and even finish.
Ensure Proper Ventilation: Maintain good airflow in the area to help the curing process. Open windows and doors if possible, and use fans to circulate air.
Post-Application Care
Step 7: Inspect the Floor
Once the epoxy floor sealer has fully cured, inspect the surface for any imperfections or areas that may require touch-ups. Look for:
Uneven Areas: Check for any spots where the sealer may not have adhered properly or where the finish appears uneven.
Bubbles or Blisters: Inspect for any bubbles or blisters that may have formed during the application process.
If you notice any issues, consider applying a second coat of sealer to address the problem areas. Follow the manufacturer's instructions for reapplication, ensuring that the surface is clean and prepared.
Step 8: Maintain Your Epoxy Floor
To ensure the longevity and performance of your epoxy floor sealer, implement a regular maintenance routine:
Regular Cleaning: Sweep or vacuum the floor regularly to remove dirt and debris. Use a damp mop with a mild detergent to clean up spills and stains.
Avoid Harsh Chemicals: While epoxy floors are resistant to many chemicals, avoid using harsh cleaners that can damage the sealer. Stick to pH-neutral cleaning solutions for best results.
Inspect for Damage: Periodically check the flooring for any signs of wear or damage. Addressing minor issues promptly can prevent more significant problems down the line.
Conclusion
Applying epoxy floor sealers is a straightforward process that can significantly enhance the durability, appearance, and longevity of your flooring. By following the steps outlined in this guide, you can ensure a successful application that protects your investment and improves your space.
From gathering materials and preparing the surface to mixing and applying the sealer, each step is crucial for achieving the best results. Remember to choose high-quality products from reputable companies like Rust-Oleum, Sherwin-Williams, and Benjamin Moore to ensure optimal performance.
By investing time and effort into properly applying epoxy floor sealers, you can enjoy the numerous benefits they offer, including protection against stains, enhanced durability, aesthetic improvements, improved slip resistance, and ease of maintenance.
Additional Resources
For further information on epoxy flooring and related topics, check out these articles:
If you are considering applying epoxy floor sealers for your space, don’t hesitate to reach out to Onyx Luxury Epoxy for professional guidance and assistance. Your flooring deserves the best protection!